No-Sugar Apple Pie: A Nourishing Homage to Autumn Comfort
Embrace the soothing embrace of autumn with this No-Sugar Apple Pie recipe, crafted to bring warmth and joy to your kitchen. Perfectly balancing the tartness of green apples with the gentle sweetness of unsweetened apple juice concentrate, this pie is a guilt-free indulgence. Infused with aromatic cinnamon and encased in a flaky crust, each slice promises a delightful blend of flavors that captures the essence of cozy evenings and familial gatherings.
Ingredients Overview
2 (9-inch) Pie Crusts
- Opt for homemade or store-bought pie crusts for convenience. Ensure they are chilled before use to achieve a crisp texture.
1 (12 Fluid Ounce) Can Unsweetened Apple Juice Concentrate, Thawed
- This serves as the natural sweetener and binder for the apple filling, providing a concentrated apple flavor without added sugars.
3 Tablespoons Cornstarch
- Used to thicken the apple filling, creating a luscious consistency that holds together beautifully when sliced.
1 Tablespoon Ground Cinnamon
- Adds warmth and depth to the filling, complementing the natural sweetness of the apples and juice concentrate.
6 Cups Sliced Green Apples
- Opt for tart varieties like Granny Smith apples, as their firm texture holds up well during baking and balances the sweetness of the filling.
Step-by-Step Cooking Instructions
Preheat the Oven:
1. Prepare for Baking
- Preheat: Begin by preheating your oven to 350 degrees F (175 degrees C). A well-heated oven ensures even baking and a golden crust.
Prepare the Filling:
2. Mix the Thickening Agent
- Blend: In a small bowl, whisk together 1/3 cup of the apple juice concentrate with cornstarch and ground cinnamon until smooth and lump-free. Set aside this mixture to allow the cornstarch to fully dissolve.
3. Cook the Apples
- Simmer: In a large saucepan, combine the sliced green apples with the remaining apple juice concentrate. Bring the mixture to a gentle simmer over medium heat, stirring occasionally. Cook until the apples are tender yet still hold their shape, approximately 10 minutes.
4. Thicken the Filling
- Incorporate: Stir in the cornstarch mixture into the saucepan with the simmered apples. Continue cooking and stirring until the filling thickens to a glossy consistency. This step ensures the pie holds together when sliced.
Assemble the Pie:
5. Create the Pie
- Layer: Spoon the warm apple mixture into one of the prepared pie crusts, spreading it evenly to ensure every slice is filled with apple goodness.
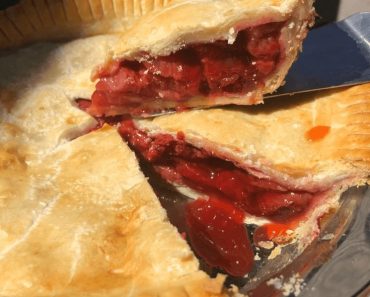
- Cover: Place the second pie crust over the apple filling. Seal the edges by gently pressing the top and bottom crusts together, then flute the edges decoratively. To allow steam to escape during baking, cut several small vents in the top crust.
Bake to Perfection:
6. Finalize the Bake
- Bake: Transfer the assembled pie to the preheated oven. Bake for approximately 45 minutes, or until the crust turns a rich golden brown hue. To prevent the edges from over-browning, consider covering them with foil halfway through the baking process.
Storage and Reheating Tips
Storage:
- Cool Completely: Allow the pie to cool completely at room temperature before covering it loosely with foil or plastic wrap.
- Refrigeration: Store the cooled pie in the refrigerator for up to 3 days to maintain freshness and flavor.
Reheating:
- Oven Method: For optimal texture, reheat individual slices in a preheated oven at 350 degrees F (175 degrees C) for about 10 minutes, or until warmed through.
- Microwave Method: If reheating a slice, place it on a microwave-safe plate and heat for 20-30 seconds. Be cautious not to overheat, as this can make the crust chewy.
Helpful Tips for Enhancing the Recipe
Choose Apples Wisely: Select apples that are firm and tart, such as Granny Smith or Braeburn, for the best texture and flavor.
Adjust Sweetness: Taste your filling before baking. If desired, add a touch of honey or maple syrup to enhance sweetness without altering the texture.
Prevent Soggy Crust: Sprinkle a thin layer of ground nuts or breadcrumbs on the bottom crust before adding the filling to absorb excess moisture.
Decorative Crust: Use cookie cutters to create shapes from the top crust for a festive touch before baking.
Chill Dough: Refrigerate the pie crust dough for at least 30 minutes before rolling it out to prevent shrinkage during baking.
Use a Pie Shield: Protect the edges of the crust with foil or a pie shield to prevent them from burning while the pie bakes.
Let It Set: Allow the pie to cool for at least 2 hours after baking before slicing. This allows the filling to firm up for cleaner cuts.
Serve with a Twist: Pair each slice with a scoop of vanilla bean ice cream or a dollop of whipped cream for a delightful contrast of warm and cold textures.
Popular Questions and Answers
What type of pie crust works best for this recipe?
- Answer: Both store-bought and homemade pie crusts work well. Ensure they are chilled before use for a flakier texture.
Can I substitute the apple juice concentrate with fresh apple juice?
- Answer: Using unsweetened apple juice concentrate is recommended for its concentrated flavor and ability to thicken the filling. Fresh apple juice may require additional thickening agents.
How do I prevent the pie crust from becoming soggy?
- Answer: Pre-bake the bottom crust slightly or sprinkle it with ground nuts or breadcrumbs before adding the filling to absorb excess moisture.
Can I freeze this apple pie?
- Answer: Yes, you can freeze the unbaked pie. Wrap it tightly in plastic wrap and aluminum foil, and freeze for up to 3 months. Bake from frozen, adding additional baking time as needed.
Is it necessary to use cornstarch for thickening?
- Answer: Cornstarch ensures a smooth, glossy filling. You can substitute it with tapioca starch or flour, but adjust the quantity accordingly for similar thickening properties.
How can I achieve a perfectly flaky crust?
- Answer: Use cold butter and ice water when making the pie crust, and avoid overworking the dough. Refrigerate the dough before rolling it out for best results.
Can I make this pie ahead of time?
- Answer: Yes, prepare the pie up to a day in advance and refrigerate it until ready to bake. Bring it to room temperature before baking for even cooking.
What do I do if the filling is too runny after baking?
- Answer: Allow the pie to cool completely before slicing to allow the filling to set. If still runny, consider adding more thickening agent next time.
How do I ensure the apples are cooked perfectly?
- Answer: Simmer the apples until just tender but still slightly firm to maintain their shape and prevent mushiness in the pie.
Why is it important to let the pie cool before serving?
- Answer: Cooling allows the filling to set, making it easier to slice and ensuring a cleaner presentation.
Secrets for Achieving Culinary Perfection
Keep It Chilled: Chill your pie crust ingredients and assembled pie before baking to maintain flakiness.
Balance Flavors: Adjust the sweetness of the filling to your preference with natural sweeteners like honey or maple syrup.
Perfect the Crust: Experiment with decorative crust patterns or use a lattice design for added visual appeal.
Experiment with Spices: Add a pinch of nutmeg or allspice to the filling for a nuanced flavor profile.
Serve with Love: Enjoy each slice warm, paired with your favorite beverage for a cozy indulgence.
Prevent Over-Browning: Cover the pie edges with foil if they start to brown too quickly during baking.
Creative Toppings: Garnish each slice with a dusting of powdered sugar or a drizzle of caramel for a decadent finish.
Share the Joy: Share this pie with loved ones and savor the warmth and comfort it brings to any occasion

