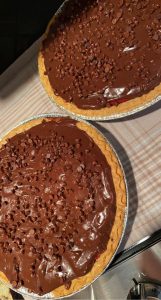
Red Velvet Pie with Decadent Chocolate Drizzle
Ingredients:
Pie Crust:
- 1 pre-made or homemade pie crust
Red Velvet Filling:
- 1 box of red velvet cake mix
- Ingredients required for cake mix (eggs, oil)
- 1/2 cup milk (substitute for water as per preference)
Chocolate Drizzle:
- 1/2 stick (1/4 cup) butter
- 1 cup chocolate chips (semi-sweet or milk chocolate)
- 1 can (14 ounces) sweetened condensed milk
Instructions:
1. Preheat the Oven:
- Preheat your oven according to the instructions on the red velvet cake mix box.
2. Prepare Pie Crust:
- Place the pie crust in a pie dish according to the package instructions, or prepare a homemade crust if desired.
3. Make Red Velvet Filling:
- In a large mixing bowl, prepare the red velvet cake mix according to the instructions on the box.
- Substitute milk for the water, and add any additional ingredients required by the cake mix.
4. Pour Red Velvet Filling:
- Pour the prepared red velvet cake batter into the pie crust.
5. Bake:
- Follow the baking instructions on the red velvet cake mix box for a pie or cake. Bake until a toothpick inserted into the center comes out clean.
6. Prepare Chocolate Drizzle:
- While the pie is baking, prepare the chocolate drizzle. In a saucepan over medium heat, melt the butter.
- Add the chocolate chips and sweetened condensed milk to the melted butter, stirring continuously until the mixture is smooth and well combined. Remove from heat.
7. Drizzle Chocolate Over the Pie:
- Once the red velvet pie is done baking, allow it to cool for a few minutes.
- Pour the warm chocolate drizzle over the cooled pie, spreading it evenly with a spatula.
8. Allow to Set:
- Allow the pie to cool completely, allowing the chocolate drizzle to set.
9. Serve and Enjoy:
- Slice the red velvet pie into portions and serve. The combination of red velvet and the rich chocolate drizzle is sure to be a hit!
This easy and indulgent Red Velvet Pie with Chocolate Drizzle is perfect for any occasion. Enjoy!